


How to Clean a Bong: Easy Steps for Spotless Glass
Clean like a pro by cleaning sections, not one sealed piece. Take the build apart by hand, seal each glass section, soak and shake it on its own, rinse until the water runs clear, dry it completely, and only then reassemble. Work dirtiest first, keep bamboo rings dry, never force a joint, and inspect each percolator against the light.
Keeping your bong clean is more than just about aesthetics, it's about enhancing your smoking experience and safeguarding your health.
Over time, residue from smoke and water builds up, which can alter the taste of your sessions and even harbor harmful bacteria and mold.
Cleaning your bong regularly ensures you get the smoothest, freshest hits and extends the lifespan of your glass or silicone masterpiece.
Whether you're a seasoned bong enthusiast or a casual smoker, understanding how to clean a bong properly is essential for both safety and enjoyment.
In this blog, we will cover:
The importance of regular bong cleaning for health and taste.
Step-by-step instructions on how to clean a bong, including essential tools.
Tips for keeping your bong clean longer and dealing with stubborn stains.
TABLE OF CONTENT
The Importance of Regular Bong Cleaning

Keeping your bong pristine isn't solely for looks; it's vital for safeguarding your health and guaranteeing each session is as delightful as the first one.
Residue from water and herbal material can harbor bacteria, mold, and unpleasant smells and lead to clogged bong parts [1].
Cleaning your bong regularly prevents harmful microorganisms from making themselves at home in places you can't see.
Moreover, a clean bong ensures that you taste what you're supposed to taste without old residues altering the flavor profile [2]. This enhances both safety and satisfaction with each session.
KEY TAKEAWAY
Regular bong cleaning provides you with a high-quality smoking experience and protected health. You'll know it's time to clean your bong if there's a ring forming around the waterline, residue floating in the water, or an odd smell. Use isopropyl alcohol, coarse salt, sponge and paper towels, cotton swabs, and a zip-top plastic bag to clean all your bong parts. If your bong is too hard to clean, consider an easy to clean bong like a modular bong.
Tools You'll Need to Clean Your Bong
Bong cleaning doesn't require any specialized or expensive tools. Most of the items you'll need are probably lying around in your house.
Here's a list of what you'll need:
Isopropyl Alcohol: This will act as a disinfectant, cutting through the oils in the residual sticky resin.
Dish Soap: This will help you clean the exterior of your bong.
Coarse Salt: Salt acts as an abrasive, helping to remove stuck-on filth.
Sponge and Paper Towels: These are for wiping the interior and exterior of your bong.
Cotton Swab: You'll need this to clean smaller, hard-to-reach areas.
Zip-top Plastic Bag: This will be used to soak smaller pieces of your bong.
- Bottle Brush (optional): This will come in handy if your bong's interior is too narrow to clean with a paper towel.
Step-by-Step Guide on How to Clean a Bong
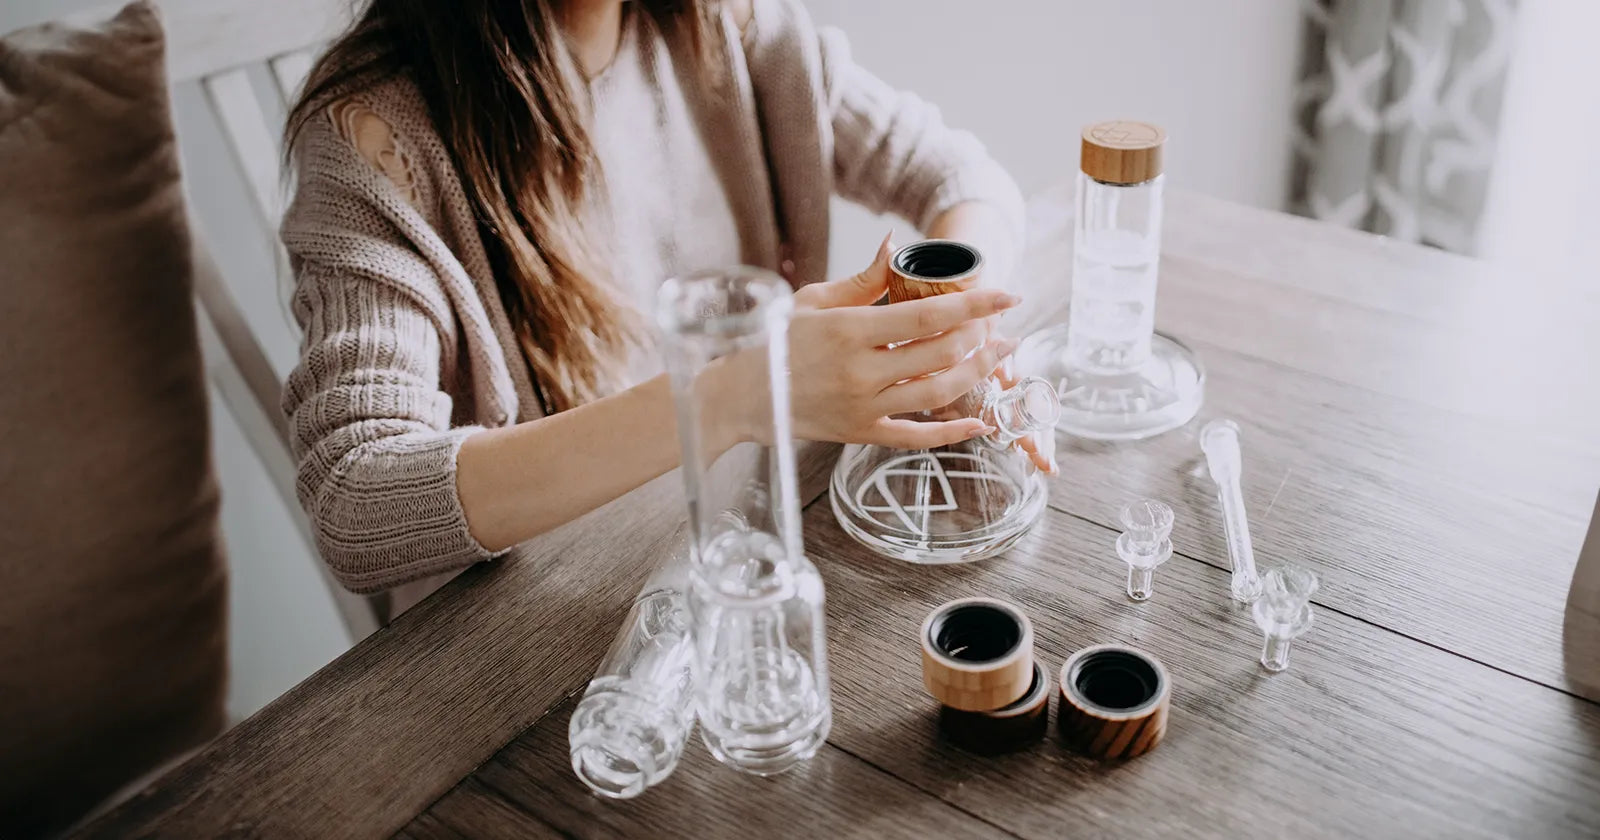


Now that you know why, when, and what you need to clean your bong, let's dive into the step-by-step process of how to clean a bong.
Step 1: Disassemble and Rinse
Start by carefully disassembling your bong.
Remove the mouthpiece, bowl, and any other detachable parts. Then, pour out dirty water and rinse the bong with clean water.
We rinse your bong at the end of the day before going to sleep, especially after using it.
It is a lot easier to clean with a quick shake and rinse than wait till days after the dirt has baked onto the inside of the glass.
Make it a part of a relaxing evening ritual that lets you pick up your bong the next day, cleaned and ready to use.
Step 2: Add Cleaning Alcohol and Salt
Next, fill the chamber of the bong halfway with isopropyl alcohol.
Then, add two to three tablespoons of coarse salt. The alcohol will act as a disinfectant, while the salt will be an abrasive to scrub off the gunk.
You can also use a bong cleaning solution like the Formula 420. There is a reason why it got 4.5 stars and over 1000 reviews via Amazon.
This product works like a charm; we have been using it for years.
Step 3: Shake
Cover the top of the bong with your hand or a stopper and shake it well. This will help the alcohol and salt mixture break down and scrub off the residue. Allow the mixture to sit for about 10 minutes.
We've developed cleaning caps exclusively for our glass bongs if you have a VITAE Glass detachable bong.
They twist on easily to provide a full seal so you can shake the bong hard and in all different directions to get the solution in every nook and cranny.
Every set comes with 2 cleaning caps for the mouthpiece with 2 ends. You can use the same cap for the base.
You don’t have to worry about splashing spoilt water/solution/alcohol all over the floor and reducing the risk of damage since your hand isn’t trying to cup the piece awkwardly while cleaning.
Step 4: Dump and Scrub
After 10 minutes, pour out the dirty alcohol-salt mixture.
Use a paper towel or a bottle brush to scrub the inside of the bong to remove any remaining residue.
If you have bongs with added filtration, such as honeycomb, inline, and percolators, they can be tricky to clean, especially if you’re not consistent about cleaning.
Invest in cleaning brushes of different sizes and flexibility to reach even the most difficult spots.
Step 5: Rinse and Shake
Rinse the bong with clean water, cover the top, and shake it again to remove all the cleaning agents. Repeat this process until the water runs clear and your bong is squeaky clean.
Step 6: Clean the Exterior
Use dish soap and a sponge to clean the exterior of the bong. This will remove any smudges or fingerprints, leaving your bong looking as good as new.
Step 7: Clean Removable Pieces
To clean the removable pieces, remove any large pieces of debris. Then, place these pieces in a zip-top bag filled with isopropyl alcohol and a couple of tablespoons of salt. Allow them to soak for about 10 minutes.
Step 8: Rinse Removable Pieces
Finally, shake the bag to agitate the cleaning solution, then rinse the pieces under warm water until all the cleaning solution has been removed. Ensure that all the pieces are thoroughly rinsed to avoid inhaling any residual cleaning agents.
The Section-by-Section Deep Clean
For a monthly deep clean, take the build apart and clean each section on its own, instead of shaking one sealed piece and hoping every chamber got clean. The method below is the pro version of the routine above: same logic, longer soaks, full inspection.
Why does the pro clean start with disassembly?
Because resin hides where a fixed piece cannot be reached, and a modular piece has no such hiding place once it is apart. The bowl and downstem collect the heaviest buildup. The base chamber collects the waterline ring. A percolator module collects residue inside its own small passages. The mouthpiece collects the film you actually taste. Shaking one sealed tower with alcohol and salt, the general method in this guide, can improve all of them at once, but it cannot show you any of them, and it cannot give the dirtiest section a longer soak than the cleanest one.
Disassembly changes the economics of the job in a second way. When a section is separate, it is small, light, and easy to hold over a sink. You shake less liquid, you spill less, and you break less. Our dedicated disassembly walkthrough, Glass Bong Disassemble for Cleaning: A Step-by-Step Guide, covers the twist and separation in detail, so this guide does not repeat it. The rule that matters here is simple, separate first, then clean, never the other way around.
There is one more reason pros disassemble, and it is the reason this guide exists. A modular build is a system of replaceable parts, and a deep clean is also an inspection. When the sections are apart, you can check the single helical thread on each glass mouth for grit, check each bamboo ring for dampness, check each percolator for a clogged hole, and check the bowl for a crack, all in one pass. A piece that is cleaned section by section is also a piece that is checked section by section, and that is what keeps a build in service for years instead of one season.
What is in the pro cleaning kit?
The kit is short on purpose. Everything below is either a Vitae Glass part or a household supply, and nothing in it requires a specialty cleaner.
The Vitae Glass parts:
- Universal Cleaning Plugs, from $5.99 for one set, or $9.99 for two sets. One set is one big plug and one small plug, and it is the single most useful cleaning purchase in the catalog, because a plug turns any open glass section into a sealed shaker.
- The build itself. The examples in this guide use the builds our readers actually own, the 16" Voyager UFO Bong at $329, The Classic Beaker Base at $119 for base and downstem, or $129 with bowl, The Swiss Sphere Base at $185 base only, or $195 with bowl, The Voyager Base at $165 base only, and the THC Base at $115 base only, or $125 with bowl. The 16" Starter Set is the honest starting point at $264 for the Trio configuration with the case excluded, with the Hourglass default variants still at, exactly as flagged in the last four campaign posts.
The household supplies:
- Isopropyl alcohol, 90% where you can find it, 70% works with a longer soak. Leafly's cleaning guide makes the same point, 70% works fine and 90% is better, and notes that salt is not strictly necessary but helps dislodge chunks of resin.
- Coarse salt, a few tablespoons per section. Fine table salt dissolves too fast to scrub, so coarse is the pro choice.
- Warm water, never boiling water into cold glass. Sudden temperature change is the fastest way to crack even thick borosilicate, and our glass is 5 mm borosilicate, thick, not invincible.
- A soft bottle brush or pipe cleaners for the downstem, cotton swabs for the bowl and joints, a towel or old rag under the work area, and a drying rack or clean towel for the sections.

How do you deep clean each section?
Work in this order, dirtiest first, so the clean sections never sit in dirty rinse water.
1. Empty and rinse. Empty all water from every section, then rinse each section with warm water to flush loose debris. This is the step the timed routine and the hub both start with, and it matters more in a deep clean, because loose ash flushed now does not become grit in the soak later.
2. Bowl and downstem. These two hold the worst buildup, so they get the longest soak. Drop them in a container or zip bag with alcohol and coarse salt, seal it, and let them soak for 30 minutes for regular buildup, or a few hours to overnight for baked on resin. Leafly gives the same overnight range for tough tar. After soaking, shake, then use a pipe cleaner through the downstem and a cotton swab around the bowl. Rinse with warm water until no salt grit and no alcohol smell remain.
3. Base chamber. Seal the base with plugs or a cap, add alcohol and a few tablespoons of coarse salt, and shake for one to two minutes, turning the base so the solution reaches the waterline ring and every inner wall. Pour out, inspect against the light, and repeat with fresh solution if any brown streaks or tackiness remain. A second fresh soak beats a longer shake with dirty solution, every time.
4. Mouthpiece. The mouthpiece is the section your mouth touches, so it gets the strictest rinse standard in this guide, rinse until the water is clear, the glass is smooth rather than tacky, and no alcohol smell remains at all. A straight open tube rinses fast, which is one more reason the open lip design cleans better than a narrow fixed neck.
5. Rings, caps, and plugs. Rinse the bamboo rings and the cleaning parts themselves after the job, wipe them dry, and store them dry. The rings are part of the system, not an afterthought, and a ring stored damp is a ring that will smell like the last session.

How do you care for the thread and the bamboo rings?
This is the section no general cleaning guide can write, because it only exists on a modular system, and it is where most owners do real damage without knowing it.
The modular thread is a single helical turn on the glass only, about 360 to 390 degrees, winding once around the tube mouth with its ends slightly offset so it reads as a real screw thread with a lead. It stays with the glass when disassembled, and it is never on the bamboo exterior. In a deep clean, the thread needs two things, and only two things. First, rinse the grit out of the thread valley before reassembly, because salt and resin grit ground between two glass threads during twisting is what wears a joint. A cotton swab with warm water, run once around the turn, does the job. Second, reassemble dry and gently, one short twist, no forcing. If a joint resists, stop, separate, rinse again, and try again. A thread that is forced past grit is a thread that is damaged, and no cleaning product fixes that.
The bamboo connector rings are open annular rings with a visible hollow interior, never solid discs, and their threading is internal and hidden, never shown on the outside. Treat them like wood, because they are wood. Wipe them clean, wipe them dry, and never soak them in alcohol and salt the way you soak glass. Wood that soaks swells, and a swollen ring seats badly. The same rule covers any wooden part on the build, keep it dry, keep it clean, and let it air dry fully before it goes back into a joint. If a ring ever feels damp after cleaning, leave it out of the build until it is dry to the touch. A dry ring is a ring that seals the way it was made to seal.
How do you handle percolator modules?
Percolator modules are clear glass cylinders with the real percolator inside and solid bamboo caps closing both ends. The pro rule for them is patience, not force. Remove the bamboo caps, set the caps aside dry, and soak the glass cylinder on its own, so the solution can move through the percolator passages from both ends. Shake gently, not violently, because a percolator is a network of small internal passages, and violent shaking with coarse salt does not clean those passages faster, it just risks the cylinder. After soaking, rinse from both ends with warm water until the water runs clear, then hold the cylinder up to the light and look through it. If any passage still shows a brown line, soak again with fresh solution. A percolator that looks clear through the glass is clean, and a percolator that still shows lines is not, whatever the clock says.
For the builds in this guide, that means the honeycomb disc in The Voyager Base, the triple comb diffusion built into the THC Base, and the three levels of 3 holes in The Swiss Sphere Base, 200 mm tall in 5 mm borosilicate, set 120 degrees apart and converging in a Y pattern at the centre, counter stacked in alternating rotation. Each of those designs cleans the same way, soak the glass, rinse from both ends, inspect against the light, repeat if needed. Never poke a percolator hole with a metal tool. A pipe cleaner is soft, a metal pick is not, and a scratched passage collects resin faster than a smooth one.

What fixes stubborn resin, cloudy film, and lingering smell?
Three different problems, three different fixes, and confusing them is why deep cleans fail.
Stubborn resin is brown, tacky, and stuck. The fix is time plus fresh solution, not more force. Soak the section for a few hours to overnight in fresh alcohol and salt, shake again, and repeat with fresh solution if needed. Leafly's guide gives the same overnight range, and the reason is chemical, the alcohol needs contact time to dissolve resin that shaking alone cannot reach.
Cloudy film is white or hazy, and it is usually mineral film from hard water or salt left behind by an incomplete rinse, not resin. The fix is a thorough warm water rinse, followed by air drying, not another alcohol soak. If the film survives a full rinse, a short soak in warm water with a drop of mild dish soap, followed by another full rinse, clears it. Rinse until the glass is smooth to the touch, because grit left on glass becomes the next layer of buildup.
Lingering smell is almost always stale water or a damp part, not dirty glass. The fix is the routine, not the solvent. Empty water after every session, rinse before storing, and store sections sealed and dry. A capped, dry section in a drawer smells like nothing, and a full piece of stale water on a shelf smells like the last week. If a clean, dry section still smells, check the bamboo rings and the caps, because wood holds odor longer than glass, and a damp ring is the usual culprit.
The Corning Museum of Glass conservation lab works the same way at a different scale, and it is worth borrowing their discipline. Their conservators wash glass in a large plastic sink, because plastic is softer than a metal or stone sink and helps prevent damage from minor bumps, using tap water and a mild detergent followed by thorough rinsing. The home version of that discipline is a towel in the sink, a plastic basin where it fits, warm water, mild soap for the final wash, and a rinse you do not rush. Glass that is washed gently lasts, and glass that is banged around a porcelain sink does not, whatever the brand.
What should you never do to a modular piece?
Five rules, each one learned from a real breakage or a real ruined joint.
- Never pour boiling water into cold glass. Warm water is the working temperature in this guide, and sudden temperature change can crack even 5 mm borosilicate.
- Never put bamboo rings, wooden parts, or cork travel caps through a soaking or dishwasher cycle as if they were glass. Wood and cork are not glass, and the dishwasher question deserves its own post, Can You Put a Bong In The Dishwasher? Learn Which Ones and How To Do It Safely, which this guide links instead of summarizing badly.
- Never use abrasive pads, metal picks, or harsh chemical cleaners on the glass. Coarse salt in solution is the abrasive in this method, and it is soft, suspended, and rinsed away. A scouring pad is none of those things.
- Never force a joint. If a thread resists, rinse the grit out and try again dry. Forcing a joint past grit damages the single helical turn, and that damage is permanent.
- Never reassemble damp. Every section, every ring, and every cap must be dry to the touch before it goes back on the build. A damp build stored closed is a stale build, and a damp thread ground together is a worn thread.
How often should each part be cleaned?
This section keeps the schedule short on purpose, because a schedule that nobody follows is worse than a short one that is followed. The full schedule, by part and by how often you use your piece, lives in our guide How Often Should You Clean Your Bong?. The working version used in our own shop is this.
- After every session, empty the water, every time, no exceptions. This one habit does more than any deep clean.
- The bowl and downstem get a rinse after heavy use and a full soak at every deep clean, because they collect buildup fastest.
- The base, mouthpiece, and percolator sections get a deep clean when the waterline ring appears, when the draw tightens, when the glass stops looking clear against the light, or at least once a month of regular use, whichever comes first.
- The bamboo rings get wiped dry at every clean and inspected at every deep clean.
- A full section by section deep clean, every section, every ring, inspected and reassembled, is the Black Friday reset in this guide, the clean you do before the holidays, after the holidays, and whenever a build changes hands or changes configuration.
If you only remember one line from this section, remember this, empty water daily, deep clean monthly, inspect every time. The daily habit keeps the monthly job short, and the monthly job keeps the build alive.

The reassembly checklist
Reassembly is the second half of the pro clean, and it is where a good clean becomes a good build again.
- Every section is dry to the touch, glass and bamboo alike.
- Every thread valley is free of grit, checked with a fingertip, not assumed.
- Every percolator passage is clear when held up to the light.
- Bamboo rings sit at each glass to glass joint, open and hollow, with no thread visible on the outside.
- The build is complete, beaker or sphere base at the bottom, bamboo ring at each joint, open mouthpiece lip on top, glass bowl seated in the side arm.
- One short twist per joint, gentle, no forcing. If a joint resists, separate and rinse again.
- Fresh water, filled to the right level for the base, and a first draw that tastes like clean glass, not like the cleaning shelf.

Then the sustainability note. One tree is planted per module through One Tree Planted, so trees planted equals the number of modules in the build. A two module daily driver plants two trees, and a four module weekend stack plants four trees. Our long term goal is one million trees by 2030, and packaging is recyclable and made from recycled materials. A build that lasts longer because it is cleaned properly is also a build that does not need replacing, and that is the quieter half of the sustainability story.
Pro deep clean FAQ
What is the fastest way to deep clean a bong properly? Separate it first, then clean the sections in parallel. Bowl and downstem soak while the base shakes, and the mouthpiece rinses while the percolator soaks. The timed routine in How to Clean a Bong in Under 5 Minutes: The Modular Routine is the daily version of this method, and this guide is the monthly version, same logic, longer soaks, full inspection.
Can you clean a bong without taking it apart? You can improve it, but you cannot deep clean it, because you cannot inspect what you cannot see. The general method in this guide, alcohol and salt shaken in a sealed piece, is a good general clean for a fixed piece. On a modular build, taking it apart is free, it takes seconds, and it turns a guess into a check.
How do you clean a percolator without damaging it? Soak the glass cylinder on its own with its bamboo caps removed and set aside dry, shake gently, rinse from both ends with warm water, and hold it up to the light. Never poke the holes with a metal tool, and never shake violently with coarse salt. A passage that still shows a brown line needs another fresh soak, not more force.
Should bamboo rings be soaked? No. Wipe bamboo rings clean, wipe them dry, and never soak them in alcohol and salt the way you soak glass. Bamboo rings are open annular rings with internal threading that is never visible outside, and wood that soaks swells and seats badly. A damp ring stays out of the build until it is dry to the touch.
Why does my clean bong still smell? Check for damp parts first, especially bamboo rings and caps, then check for stale water habits. A clean, dry, capped section smells like nothing. A clean glass section reassembled damp, or a build left full of old water, smells like the last session, whatever solvent was used.
Is the dishwasher safe for a modular bong? Read the dedicated post before deciding, Can You Put a Bong In The Dishwasher? Learn Which Ones and How To Do It Safely. This guide does not recommend a dishwasher cycle for a modular build with bamboo rings, because wood, cork, and glass do not share a cleaning cycle.
How to Clean a Percolator Bong
A percolator adds surface area for filtration, and that same surface area is where residue hides. Clean it on its own, with its caps removed, and inspect every passage against the light before it goes back on the build.
Understanding the Complexity of Percolator Bongs

Percolator bongs stand out amongst bong designs due to their intricate features, which significantly enhance the smoking experience. Fundamentally, perc bongs are crafted to chill and purify the smoke via water using diverse percolation mechanisms [1].
Far from merely a visual treat, this mechanism plays a pivotal role in ensuring each inhalation is effortlessly gentle. However, the different types of percs add a layer of complication to percolator bongs.
From tree to honeycomb and showerhead varieties, the intricate designs and tiny holes make these smoking accessories difficult to clean.
However, cleaning your percolator bong regularly is crucial to maintaining the quality of your smoking experience.
Over time, residue builds up, becoming mold or bacteria and compromising your health [2]. Since the smoke you inhale passes directly through the pipe, a dirty pipe can diminish the quality of your smoking experience and result in a harsh, unpleasant taste.
Furthermore, regular cleaning can enhance the longevity of your bong by preventing gunk and resin from clogging the glass.
Plus, a clean bong is visually appealing, making it an attractive decorative piece in your room.
How To Clean a Percolator Bong
Regardless of the type of percolator bong you own, there are straightforward ways to clean it. However, remember that the more percs you add to your bong, the more often you'll need to clean them to ensure each piece is entirely devoid of residue.

Supplies Needed
Before starting, gather the following supplies:
-
Isopropyl or rubbing alcohol (preferably 91% or higher)
-
Coarse salt or Epsom salts
-
Rubber/cork stoppers OR plastic wrap and rubber bands (to seal the bong's openings)
-
Pipe cleaners and Q-tips (for hard-to-reach areas)
-
Ziploc bags (to soak smaller bong components)
Step-By-Step Percolator Bong Cleaning Guide
Follow these steps to clean your percolator bong:
-
Disassemble your bong Carefully take apart your bong, removing all detachable parts such as the percolatorbowl, and stem.
-
Rinse with warm water: Rinse each piece to loosen the residue.
-
Mix your cleaning solution: Combine about 1 cup of isopropyl/rubbing alcohol and a handful of salt directly inside your bong, and evenly distribute it among Ziploc bags for the smaller bong parts.
-
Secure your bong: Cover the bong's openings with rubber/cork stoppers or plastic wrap secured with rubber bands, and ensure your Ziploc bags are sealed.
-
Shake everything: Give your sealed bong and Ziploc bags a good shake. The cleaning solution will react with the built-up residue, dislodging it so you can later pour it out.
-
Eliminate remaining residue: After shaking the bong and its pieces, let them settle. Then, pour out the cleaning solution and use your pipe cleaners or Q-tips to scrub off any remaining residue.
-
Rinse, dry, and use: Rinse your bong and its parts in warm water, dry each piece gently with a soft cloth, and let them air dry before reassembling them.
Advanced Cleaning Tips for Stubborn Residue
When cleaning percolator bongs, stubborn residue inside the percs can be a real headache. Yet don't despair, for powerful techniques exist designed to conquer the most obstinate blemishes.
One trick is to use your mixture of coarse salt and isopropyl alcohol and add hot water. The temperature should not be boiling, but hot enough to melt sticky residue.
The abrasive nature of the salt, coupled with the dissolving power of alcohol and hot water, makes this duo unbeatable for scrubbing away grime that can't be removed using normal bong cleaning methods [3].
Drying and Reassembling Your Bong
Once your percolator bong is sparkling clean, drying it properly is just as crucial to prevent mold growth or water spots. Spread all components on a clean towel in an area with good airflow. This phase guarantees thorough drying by ensuring each hidden corner is aired out.
Reassembly should be approached with care. Make sure each piece is completely dry before putting it back together. It’s like solving a puzzle; each part has its place for the perfect fit and function.
Maintaining Your Percolator Bong
Consider doing quick rinses after every use to maintain a clean percolator bong. Adopting this routine could lengthen the intervals between thorough cleanings, simplifying your life and ensuring seamless experiences.
Caring for your percolator bong goes beyond just cleaning it after use. Regular upkeep, involving inspections and minor adjustments, is essential for keeping your percolator bong in top-notch condition. This involves checking all components for wear and tear, especially the seals and glass connections.
Another tip is to change the water regularly, ideally after every session. Stale water can lead to mold growth and affect the taste of your smoke. Moreover, swapping out the water frequently aids in more effectively chilling the smoke.
Ensuring your bong is stored correctly is key to keeping it in prime shape. Please keep it safe where it's less likely to get knocked over or damaged. For those with detachable parts like VITAE Glass bongs, disassembling them before storage can prevent accidental damage.
Variety of Percolators to Clean
Several types of percolators are available in the market, each catering to different smokers' preferences and tastes. Some of the most popular ones include:
-
Honeycomb Percolator: Known for their compactness and efficiency, these percs consist of stacked, flat discs with numerous holes that create multiple chambers in the bong. Adding more than one honeycomb perc to a bong increases filtration.
-
Diffused Downstem Percolator Ideal for beginners, these percs are usually built directly into the bong and extend vertically into the bowl with slits at the base.
-
Tree Percolator: These percolators resemble roots, so they have additional tubes instead of just one.
-
UFO Percolator Named after their shape, UFO percolators have a flared base with slits at its base. They offer more room for the smoke to diffuse and cool, and are easy to clean.
Cleaning Percolator Bong FAQs
How do you deep clean a percolator bong?
Deep cleaning a percolator bong involves specific materials and steps to remove residue and ensure its longevity. Isopropyl alcohol. Coarse salt and Pipe cleaners. Soak your percolator bong in hot water and isopropyl alcohol to dissolve residue inside the percs. After soaking, use pipe cleaners for the tough spots. Rinse well.
What can I use to clean my perc bong other than alcohol?
If you don't have Isopropyl alcohol to clean your percolator bong, vinegar and baking soda make great alternatives. Mix them into your bong, wait 30 minutes to an hour, scrub if necessary, then rinse.
How to Remove Resin From a Glass Percolator
Resin builds up where smoke cools and clings to percolator slits, holes, and chambers. Clean it with the right method and enough contact time, not with force.
Why Resin Builds Up Inside a Percolator
Resin is the sticky residue left behind when smoke cools and travels through your setup. Water catches part of it, but percolators create extra surface area for filtration. That is great for smoother hits. It also means more places for residue to cling.
Fresh water slows buildup, but it does not stop it. Resin collects fastest around diffusion holes, inside vertical tubes, and in the splash zone just above the waterline. If the water has been sitting for a while, the residue can harden into a brown or nearly black film that does not rinse away on its own.
A dirty percolator can also make it harder to judge what is happening inside your piece. Clear glass should show off your filtration, not hide it behind a cloudy layer. Regular cleaning protects both the function and the visual impact of your setup.
What You Need Before You Clean
Set up your cleaning station before you start. You will want a resin-safe glass cleaner or a high-percentage isopropyl alcohol, coarse salt, warm water, plugs or caps for openings, and a soft towel. Pipe cleaners or soft bristle cleaning brushes can help with accessible sections, but do not force them through tight percolator holes.
Avoid metal tools, knives, and anything abrasive. They may seem useful when resin is thick, but they can scratch glass, chip an opening, or create pressure in delicate internal sections. Premium glass deserves more patience than brute force.

If you are working with a modular setup, separate the base, percolator, mouthpiece, ash catcher, bowl, and downstem first. Cleaning each component on its own is faster, more thorough, and far less awkward than trying to wash a fully assembled piece. This is one of the quiet advantages of a configurable glass system: the hard-to-reach section does not have to stay trapped in the middle of the build.
How to Remove Resin From Percolator Chambers
Start by emptying all old water. Rinse the percolator with warm water, not boiling water. Sudden temperature changes can stress glass, especially if the piece is cold or the glass is thick in some areas and thin in others. Warm water loosens the first layer of residue and helps the cleaner reach the glass more evenly.
Add your cleaning solution through the largest opening. If you are using isopropyl alcohol and salt, use enough alcohol to coat the internal chamber and a small amount of coarse salt for gentle agitation. The alcohol breaks down resin, while salt helps lift residue from surfaces as the liquid moves around. Salt is useful, but it is not magic. It cannot reach a sealed pocket unless the solution gets there first.
Cap the openings securely, then rotate and swirl the piece slowly. Let gravity move the solution through the percolator instead of shaking the glass like a cocktail mixer. A controlled motion is safer for internal structures and gives the liquid time to pass through each diffusion point.
For light residue, a few minutes of swirling may be enough. For stubborn buildup, let the solution soak for 20 to 45 minutes. The exact time depends on how long the piece has gone between cleans and how baked-on the resin has become. Do not leave alcohol-based cleaner sitting for hours if your setup includes decals, painted details, silicone accessories, or non-glass components that are not rated for it.
After soaking, swirl again and pour the cleaner out carefully. Rinse repeatedly with warm water until there is no cleaner scent and no visible residue. Fill, drain, and rotate the piece several times so water moves through every channel. A single rinse often clears the main chamber while leaving traces behind in the percolator itself.
When a Standard Soak Is Not Enough
Some resin buildup needs a second round. If the glass still looks hazy after the first rinse, repeat the process with fresh cleaner rather than adding more force. Fresh solution works better than tired, resin-darkened liquid.
For isolated spots near an opening, a soft brush or pipe cleaner can help. Keep the pressure light and only clean areas you can reach without bending or jamming the tool. Never try to poke through a honeycomb perc or narrow slit with a rigid object. If it does not move freely, it is not the right tool for that job.

You can also use a purpose-made glass cleaning solution designed for water pipes. These formulas are convenient and can work quickly, but read the directions before using them on specialty finishes or mixed-material parts. Isopropyl alcohol is inexpensive and effective, while commercial cleaners can save time. The better option depends on your setup, your cleaning habits, and how much resin you are dealing with.
Rinse, Dry, and Rebuild Without Missing a Step
A clean-looking percolator is not finished until it is fully rinsed. Run warm water through the chamber until every trace of cleaner is gone. Then do one final rinse with cool or room-temperature water. This helps bring the glass back to a neutral temperature before you handle or reassemble it.
Set each component on a soft towel and let it air-dry completely. If water remains inside a perc, tip the piece gently from different angles to drain trapped droplets. Avoid blasting water out with compressed air or striking the glass against a towel. Time and gravity are safer.
Before rebuilding, inspect connector areas, ground joints, and seals. Resin can collect where modules meet, making assembly feel sticky or uneven. Wipe those contact points clean with a soft cloth. Once dry, rebuild your configuration and add fresh water. The result should be obvious: cleaner visuals, clearer airflow, and filtration you can actually see working.
Keep Resin From Taking Over Again
The easiest way to clean a percolator is before it looks overdue. Change water after every session or at least daily if you use your piece regularly. Old water gives residue more time to settle and makes the next cleaning job much less pleasant.
A quick warm-water rinse after use also makes a major difference. It will not replace a full clean, but it clears loose particles before they settle into narrow channels. If you use an ash catcher, keep it clean too. It is your first line of defense against pulling debris and heavy resin into the main percolator.
For frequent users, a complete clean once a week is a strong baseline. Heavy sessions, concentrates, and highly resinous material may call for more frequent care. The goal is not to wait until airflow feels restricted. Keep the glass in its high-performance zone, where every component can do its job.
A Cleaner Perc Makes the Whole Build Better
Your percolator is not just another glass section. It is the filtration engine at the center of the experience. When its pathways stay clear, your setup keeps the open draw, smooth diffusion, and clean presentation that made you choose premium glass in the first place.
Give it a quick rinse before resin becomes a project, and save the deeper soak for when it is actually needed. Your next rebuild will look sharper, pull cleaner, and let the glass do what it does best: put performance on display.

When to Clean Your Bong
Identifying when to clean your bong is just as crucial as knowing how to clean it.
If you notice a ring forming around the waterline of your bong or if you spot particles of weed, resin, or residue floating in the water, it's high time to clean it.
Moreover, if your bong starts to emit a peculiar smell, that's another clear sign that it's time for a bong cleanup [3].
Many bong enthusiasts recommend cleaning your bong once every week, especially if you're a frequent user. However, even if you're an occasional smoker, empty the water after each use to prevent bacteria and mold growth.

How To Keep Your Bong Cleaner Longer
Maintaining a bong's cleanliness isn't just about regular cleaning; it's also about taking preventive steps. Incorporating specific routines into your daily use can greatly minimize the necessity and labor involved in thorough cleanings.
Choose Quality Water
Using distilled or purified bong water can prevent mineral buildup, which is harder to clean over time.
Tap water often contains minerals that contribute to residue inside your bong, making distilled water a better choice for use and cleaning [4].
Swapping to distilled or filtered bong water could majorly decrease the gunk accumulation, ensuring your bong remains pristine for extended stretches. This simple switch not only enhances the smoking experience but also makes regular maintenance much smoother.
Easy To Clean Bongs

While all bongs can be cleaned with a little effort, some designs are easier to clean than others.
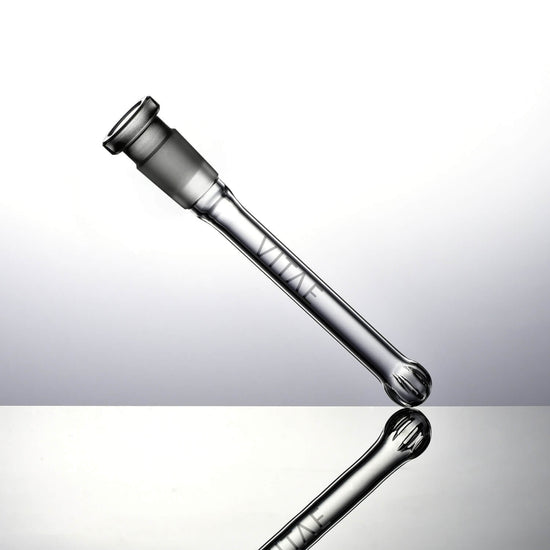
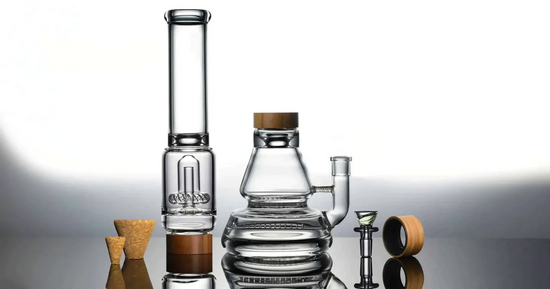
Bongs with detachable parts and modular designs are generally easier to clean due to the fact the bong can be disassembled and each bong part cleaned individually.
Traditional bongs, made from one piece of glass, make it difficult to reach places with pipe cleaners where residue likes to gather, such as the bottom of the base.
Modular bongs allow you to remove the base and other components to be easily cleaned individually.
How to Clean Different Types of Bongs
While the above method is perfect for cleaning most types of bongs, other types of bongs may require a slightly different approach.
How to Clean a Glass Bong
Glass bongs are the easiest to clean. Simply follow the above steps, and you'll have a clean and shiny bong in no time. Remember to be gentle while cleaning to avoid causing any damage to the glass.
How to Clean a Bong Bowl
The bong bowl can often be the dirtiest part of the bong as it comes into direct contact with the weed. To clean a bong bowl, follow the same steps as above, but pay extra attention to the bowl.
Place the bong bowl inside a zip-top bag with extra bong cleaning solution. Cotton swabs or a pipe cleaner can be handy for cleaning hard-to-reach corners.
How to Clean a Silicone Bong
Silicone and acrylic bongs are flexible and less prone to breaking, but require a special cleaning method.
Instead of isopropyl alcohol, use mild dish detergent and warm water. Use a soft brush to scrub the bong's interior and exterior. Avoid using harsh brushes, as they can tear the silicone material.
How to Clean a Bong with Chambers
Bongs with chambers can be tricky to clean due to the additional parts. However, the process is still quite similar.
Simply disassemble the bong, clean each part separately using the isopropyl alcohol and salt method, then rinse each piece thoroughly before reassembling.
How to Get Mold Out of a Bong
You may notice mold growth if you've left your bong uncleaned for a while. Mold in your bong is a serious issue, as inhaling mold spores can lead to respiratory problems.
If you notice mold in your bong, you must clean it thoroughly. Replacing the bong is best if the mold doesn't come off after a thorough cleaning.
To remove mold from a bong, follow the cleaning steps outlined above. However, to remove all the mold, you may need to repeat the cleaning process several times and let the bong soak in isopropyl alcohol for longer.
After cleaning, always rinse your bong thoroughly to remove any residual cleaning agents.
Homemade vs. Commercial Cleaning Solutions
Deciding on the perfect cleaner for your bong is key to keeping it in top shape for years.
While commercial cleaners are formulated specifically for such tasks, homemade solutions offer a cost-effective alternative.
Commercial products often contain powerful solvents that quickly dissolve resin and grime, making them highly effective but sometimes harsh on delicate parts.
On the other hand, homemade concoctions like vinegar and baking soda are gentler but may require more elbow grease or repeated applications to achieve similar results [5].
Safety Considerations
The safety of your cleaning solution should not be overlooked.
Commercial cleaners designed for glassware are generally safe when used as directed; however, they can contain chemicals that might irritate sensitive individuals.
Homemade solutions boast natural ingredients, reducing health risks, but ensuring proper rinsing is essential to avoid inhaling residual substances during use.
How to Clean a Bong with Baking Soda
If you don't have isopropyl alcohol, you can use a mixture of baking soda and vinegar.
The baking soda is abrasive, while the vinegar is a natural disinfectant. However, be prepared for a lot of fizzing when you combine these two ingredients!
How to Clean a Bong with Hot Water and Salt
If you don't have isopropyl alcohol, baking soda, or vinegar, hot water and salt can be a good alternative.
The hot water helps to loosen the residue, while the salt acts as an abrasive. However, this method may be less effective at removing stubborn resin buildup.
The Best Bong Cleaning Method
Over time, we've experimented with various methods and found that certain techniques yield significantly better results. Here's a detailed comparison based on firsthand experience:
Isopropyl Alcohol and Salt Method
Results: This method is highly effective for regular maintenance and deep cleaning. It removes almost all resin and buildup, leaving the bong sparkling clean. The combination of alcohol and salt works wonders, especially for hard-to-reach spots.
Vinegar and Baking Soda Method
Results: While this method is more eco-friendly and uses household items, it's less effective on heavy resin buildup. It works well for light cleaning and removing odors, but may require repeated applications for a deep clean.
Boiling Water Method
Results: Boiling is a simple, chemical-free method. It's effective for sanitizing and loosening resin, making it easier to wipe away. However, this method poses a thermal shock and cracking risk, especially for glass bongs, and doesn't clean as thoroughly as the alcohol and salt method.
Commercial Cleaners
Results: These cleaners are designed specifically for bongs and often produce good results. However, they can be more expensive than household items and may contain harsh chemicals.
Addressing Stubborn Resin and Stains

If you've ever faced the challenge of cleaning a bong, you know that stubborn resin and stains can be a real headache. These pesky buildups not only mar your bong's appearance but can also affect its performance.
To tackle this, start with an initial rinse using hot water to loosen the gunk [6]. But sometimes, hot water alone won't cut it. This is where isopropyl alcohol comes in handy.
Mix it with coarse rock salt for a scrub-free solution that dissolves even the toughest residues.
How to Clean a Bong FAQs
What is the best way to clean a glass bong?
The recommended method for achieving a sparkling, clean glass bong is to utilize isopropyl alcohol and salt. Vigorously shake these two ingredients inside your bong. Following this, thoroughly rinse with warm water for optimal results.
Is it safe to smoke out of a dirty bong?
No, it's not safe to smoke from a dirty bong. When inhaled, a dirty bong can harbor bacteria, mold, and other harmful substances that can lead to respiratory issues.
Can I use boiling water to clean my bong?
Yes, boiling water can help loosen and remove residue. However, be careful as sudden temperature changes can crack or shatter glass bongs.
What can I use to clean my bong other than alcohol?
If you don't have rubbing alcohol, the combination of vinegar and baking soda is quite effective in cleaning a bong. This mixture is not only safe and natural but also efficiently breaks down any residue. Lemon juice or hydrogen peroxide can also be used to clean a bong.
Can you clean a bong with dish soap?
While dish soap can serve as a viable solution to clean a bong, it may leave a residual film or lingering scent. If you choose to use dish soap to clean your bong, rinse thoroughly.
How do you clean a bong with vinegar?
To clean your bong with vinegar, combine equal measures of white vinegar and hot water directly into the bong. Next, introduce a generous amount of coarse salt. Once added, shake the bong vigorously to ensure thorough cleaning. Finally, rinse out the mixture thoroughly.
Now You Know How To Clean a Bong
Based on firsthand experience, the isopropyl alcohol and salt method is the most effective for deep cleaning and regular maintenance. It combines efficiency, cost-effectiveness, and thoroughness.
Cleaning your bong regularly ensures you enjoy the best smoking experience. It also helps to prevent potential health risks related to inhaling gunk, bacteria, or mold.
We walked through how to clean a bong, from prepping with the right tools to choosing between homemade or commercial cleaners.
Remember, tackling tough stains doesn't have to be hard. With our step-by-step guide, you're equipped. And don’t forget: regular maintenance beats heavy-duty cleaning any day.

Sources:
[1] Troubleshooting Common Bong Cleaning Issues
[2] Tasting Resin? Here's How to Clean Your Bong
[3] This Is Why Your Bong Stinks
[4] Distilled water vs Regular water: r/hookah
[5] What is the best way to clean a bong other than rubbing alcohol?
[6] How can I clean the inside of this bong? : r/CleaningTips


