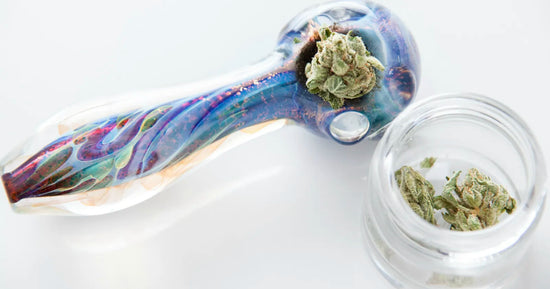
Have you ever had your one hitter get clogged, making that smooth hit feel more like a struggle?
One hitters are amazing for a quick, discreet session, but they can get dirty and clogged quickly, which affects your experience. That’s why knowing how to clean a one hitter properly is crucial—not just for a better smoking session, but for your health too!
The buildup of resin in your one hitter can harbor bacteria, which isn’t something you want near your lungs. Regular cleaning isn’t just about keeping your pipe nice—it’s about staying safe while enjoying your cannabis.
Maintaining your one hitter is simple, but it does require consistency. Keeping it clean ensures better flavor, smoother hits, and a longer-lasting pipe, which is key for anyone who enjoys their sessions.
And if you're looking to step up your smoking experience with premium, easy-to-clean pipes, VITAE Glass offers beautifully crafted options that make both maintenance and style effortless.
In this blog, we will talk:
-
How to clean a one hitter quickly with simple, effective techniques.
-
The best cleaning solutions, including eco-friendly alternatives.
-
Why regular cleaning is essential for both your smoking experience and your health.
Let’s get started and explore the best ways to keep your one hitter clean, fresh, and ready to go for every session.
Cleaning Materials You'll Need
Your one hitter is all clogged up; it's time for a clean. Before we start, we need the right materials. Here's a checklist to ensure you have everything you need:
Cleaning Solutions:
-
Isopropyl Alcohol: The MVP of cleaning solutions for one-hitters, effectively dissolving resin and buildup [5]. There are also premade cannabis cleaning solutions for smoking accessories that you can use
-
Alternative Solutions: For those preferring a more natural route, options include salt and vinegar or baking soda and vinegar mixtures. Boiling water is also effective [3].
Tools for the Task:
-
Ziploc Bag or Plastic Container: You'll use this for soaking your one-hitter in the cleaning solution [6].
-
Pipe Cleaners, Q-tips, and Small Brushes: These tools help in reaching the nooks and crannies of your one-hitter, ensuring all resin is removed [7].
-
Paper Towels: For drying your one-hitter post-clean.
Miscellaneous :
How To Clean A One Hitter Quickly

1. Disassemble:
-
Most one-hitters are made from one piece of glass, metal, bronze, or even ceramic, but there are a few one hitters on the market that require you to disassemble them first, like The DART.
-
If you have a dugout, you will also need to take it apart to clean it.
2. Preparation:
-
For all types, place your one hitter in a ziplock bag or a sealable plastic container [2].
-
Add your chosen cleaning solution until the pipe is fully submerged.
-
If using a dugout one-hitter, disassemble both components and submerge in the bag with a cleaning solution and salt [10].
3. Soaking and Agitation:
-
Let it soak, shaking the bag well to ensure the mixture reaches every part of the one-hitter.
-
For metal one-hitters, an alternative method involves placing the pipe in a small saucepan with water and bringing it to a rolling boil, swishing and swirling the one-hitter pipe in the boiling water. Use an old pan you no longer use for cooking food.
4. Avoiding Harsh Chemicals:
-
Regardless of the material, avoid using harsh chemicals like acetone cleaners.
-
Use a pipe cleaner or cotton swab with warm water for scrubbing after soaking to remove all the resin. You can use a toothpick or a poker to scratch away resin that has stuck to the inside of the pipe stem.
-
Follow the same cleaning method as metal or glass one-hitters, but avoid coarse salt for materials like wood [10].
Remember, the DART one hitter with its self-ejecting mechanism simplifies the cleaning process, making it an excellent choice if you're seeking convenience [1].
Cleaning with Isopropyl Alcohol and Salt
To clean your one hitter using isopropyl alcohol and salt, follow these detailed steps:
1. Prepare Your Cleaning Solution:
-
Place the one hitter in a sealable plastic bag or container [12].
-
Pour in enough isopropyl alcohol to cover the pipe completely.
-
Add 2-3 tablespoons of table salt to the alcohol. The salt acts as a scrubbing compound, helping to remove the resin [5].
2. Soak and Shake:
-
Seal the bag or container tightly to prevent leaks.
-
Shake the bag gently to ensure the mixture reaches all parts of the one hitter [11].
-
Let the pipe soak for at least 1 hour, or for optimal results, leave it overnight.
3. Rinse and Dry:
-
After soaking, carefully open the bag or container away from your face to avoid inhaling fumes.
-
Rinse your pipe thoroughly under hot running water to remove all cleaning solution residues.
-
Use pipe cleaners or cotton swabs to scrub the inside of the pipe for any remaining grime.
-
Give your pipe a final rinse with hot water, then set it on a dry towel and leave it to air dry for 1-2 hours.
Note: This method is not suitable for custom pipes made of stone, ceramic, wood, antler, or bone due to the potential for damage from alcohol and coarse salt.
Cleaning with Natural Products

When you're fresh out of isopropyl alcohol or just prefer a more eco-friendly approach, don't worry; your kitchen probably holds the key to a sparkling clean one-hitter:
1. Vinegar and Baking Soda Method:
-
Combine 1 part water with 1 part vinegar in a sealable plastic bag [11].
-
Add one tablespoon of baking soda. Expect a fizzy reaction as it mixes with the vinegar, which helps dislodge the gunk.
-
Submerge your one hitter in this concoction and let it soak for at least 30 minutes, though an hour is ideal for tougher residues.
-
After soaking, rinse thoroughly with warm water and use a pipe cleaner or cotton swab for any stubborn spots.
2. For Wooden One-Hitters:
-
Avoid harsh chemicals and use a gentler cleaning solution like vinegar or lemon juice [10].
-
Use a pipe cleaner or cotton swab dipped in warm water to carefully scrub the inside.
-
This method ensures the integrity of the wood is preserved while still achieving a thorough cleaning.
3. Scraping Technique:
-
Sometimes, a good old-fashioned mechanical method is all you need. Use a pipe cleaner, paperclip, or toothpick to scrape away any buildup [3] gently.
-
This method is especially useful for dry residues and can be a good preliminary step before using any liquid cleaning solutions.

Rinsing and Drying the One Hitter
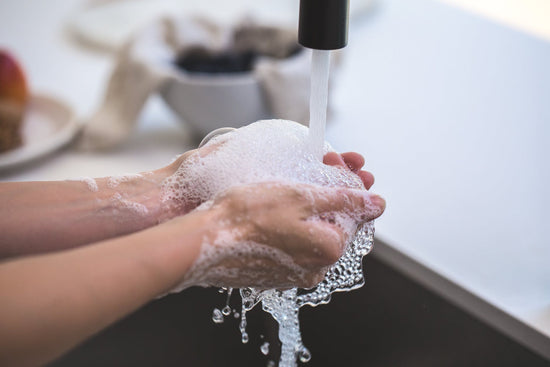
After cleaning your one hitter using any of the methods discussed, the final rinsing and drying steps are just as necessary. Damp pipes are a breeding ground for bacteria and other issues that could infect your lungs.
Here's a step-by-step guide to effectively rinse and dry your one hitter:
1. Rinsing with Warm Water:
-
Immediately after cleaning, rinse the one hitter under warm running water to wash away any remaining cleaning solution or loosened residue [2].
-
For tougher residues, especially in metal one-hitters, consider boiling water and submerging the pipe. This helps loosen and remove stubborn residues. Cleaning a metal one-hitter is not that different from cleaning other types of one-hitters.
2. Final Rinse with Cold Water:
-
Once the initial rinse with warm water is complete, give your one hitter a final rinse with cold water. This step ensures that any resin that could melt back onto the one hitter at higher temperatures is completely removed [5].
3. Drying:
-
Gently pat the one hitter dry with a paper towel to remove excess water.
-
Leave it to air dry completely on a dry towel. Ensure the one hitter is completely dry before using it again to prevent water from affecting the taste or causing damage [4].
Regular maintenance after each use, including a quick rinse and using a pipe cleaner to remove debris, will make your deep cleaning sessions less frequent and much easier.
Conclusion
One hitters are great, and if you enjoy using them, but they always get clogged, well, now you know how to clean a one-hitter. Don't just stick with the tried methods, including isopropyl alcohol and salt, but explore natural cleaning solutions like boiling water, vinegar, and baking soda.
By providing unique cleaning hacks, insights from experts, and answers to commonly asked questions directly related to the upkeep of one hitters, this guide stands as a testament to thorough research and a deep understanding of the needs of smoking aficionados.
Cleaning A One Hitter FAQs
What is the most effective method for cleaning a one hitter?
To thoroughly clean your one hitter, follow these steps: Place the disassembled one hitter into a Ziplock bag. Pour enough alcohol into the bag to fully submerge the one hitter. Then, add 2 ounces of hot water and some salt. Securely close the bag, shake it well to remove residue, and finally, rinse the one hitter with water.
How can I remove resin from my one hitter?
To clean resin from any smoking device, including a one hitter, soak it in alcohol, adding salt to act as an abrasive. After letting it sit, shake the mixture to scrub off the resin. Use a toothpick on stubborn resin. Rinse with cold water to prevent the resin from re-adhering to the one hitter.
What should I do if my one hitter gets clogged?
To unclog a one hitter, first ensure it is emptied of ash after each use and deep clean it every 2-3 weeks. For clogs, soak the one hitter in a mixture of coarse salt and isopropyl alcohol. After soaking, use a pipe cleaner or a poker tool to remove the clog.
Which one hitter is the easiest to clean?
The Grindhouse Rosewood Push Ejector Taster Bat is known as the best self-cleaning one hitter available, making it exceptionally easy to maintain.